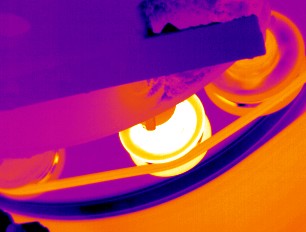
Thermal imaging is a very popular, effective tool that is used in the mechanical industry. It Is often referred as mechanical thermography and it is most often used in condition monitoring of mechanical equipment.
Mechanical equipment failure is often predictable if quality data is available during its normal operational lifetime. All mechanical equipment will suffer if it is operated incorrectly, poorly maintained or used incorrectly. The first sign of a machine in distress is often a rise in temperature of the component under a stress condition. This can be discerned if the equipment is monitored on a regular schedule.
Thermal Cameras can monitor the machines while it is running and over time with regular surveys, results can be compared to document trends. Thermography determines a change in the operational temperature that may indicate a defect. As the temperature of an object can be affected by the environmental conditions and machine load, it is important that all factors are documented. Many organisations will choose more than one technology to measure the operational condition of a machine and maximise related data for effective results.
Mechanical thermography inspections rely on a thorough routine inspection concentrating on the areas that are most likely to have mechanical stresses. This is often the area where bearings are installed and mechanical seals located, but could include gear mesh, impellor, drive belt, valves, coupling and even cooling systems.
Infrared camera are sensitive to the radiation emitted from objects and can (when the camera parameters have been correctly adjusted) measure temperature. However, technicians often used qualitative inspection techniques to compare machine components when multiple machines are in operation. This requires knowledge of the operational conditions and the machines being identical. This is often a quick check method to initially understand if there is a significant differential.
As materials often emit infrared radiation at varying rates, the absolute temperature of an object requires a good knowledge of infrared theory, materials as well as the effects of the object geometry, angle of view and environmental conditions. Quantitative thermography (absolute temperature measurement) using remote infrared cameras can be affected by many factors.
Below is a list of just some of the Mechanical equipment that can be surveyed using a SATIR Thermal Camera
Monitoring should be carried out by mechanical biased staff that will understand the equipment and normal operating conditions. Baseline studies are initially carried out to document the thermal profile of a machine and subsequent inspections compared against the baseline image until the trend indicates a potential problem or the machine is changed or overhauled.
A good condition monitoring programme will help to eliminate unsafe conditions, unexpected failures and should give sufficient warning of an impending problem to allow staff to make an informed decision on the steps required to rectify the situation.